There are some motherboards that will be installed inside desktop PCs and then pretty much never see the light of day again. These bare-basic boards will be touched only by factory workers and then sealed off inside their boxes; rarely seen even for cleaning. Then there’s the enthusiast breed of motherboards, which are designed to be showed off at every opportunity. They have flashy lights, colourful accents, and of course elaborate heatsinks. They need to stand out in a very commoditised but intensely competitive market.
MSI has done all of that and developed a few new bells and whistles with its Z170A Xpower Gaming Titanium Edition model. This is the company’s new statement piece, and it’s very effective. It’s also packed to the gills with high-end features in pretty much every subsystem: audio, memory, storage, expansion, and overclocking. Let’s dive in.
 Design, layout and features
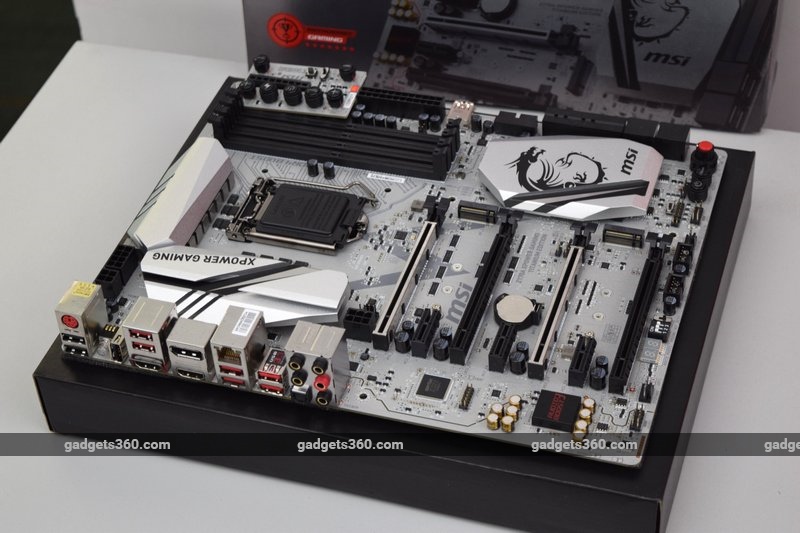
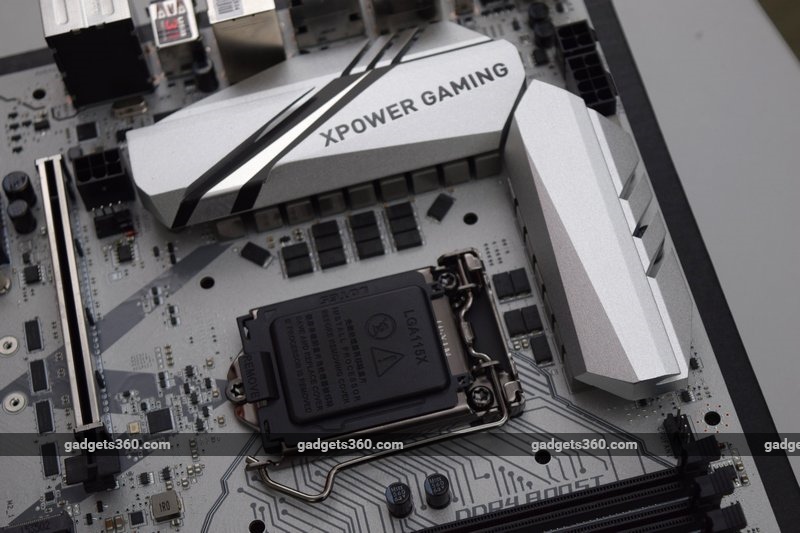
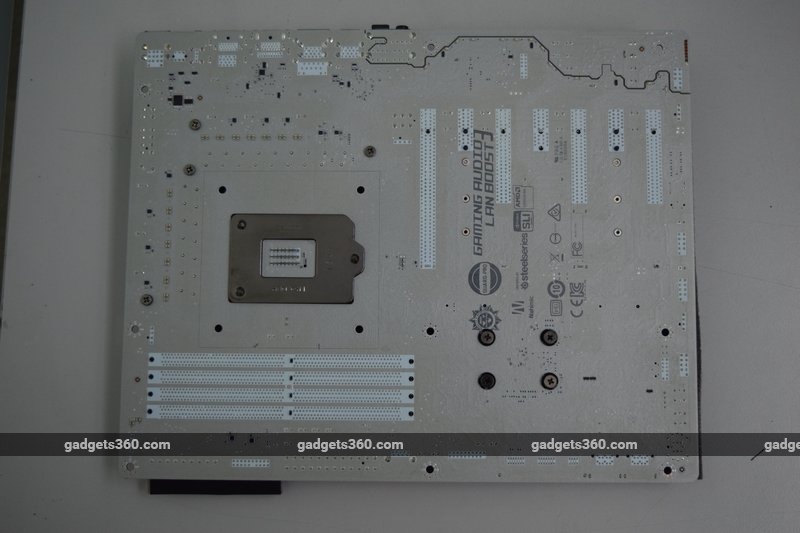
The Xpower Z170A looks phenomenal. If you’re building inside a high-end PC cabinet with a huge side window, this is the kind of board you’d want to show off. The pale grey colour isn’t actually the board itself; MSI has managed to print a thin layer on both sides of the PCB which is much like the labels you see on on some SD cards and pen drives. It could get scuffed, especially at the edges and corners, but you don’t need to be any more careful than you would when assembling any other high-end parts.
The printing actually makes the board look blank in some areas where we’re used to seeing at least circuit board traces. MSI has made up for that with graphical touches around the CPU socket and additional accents such as the metal-plated primary PCIe slots.
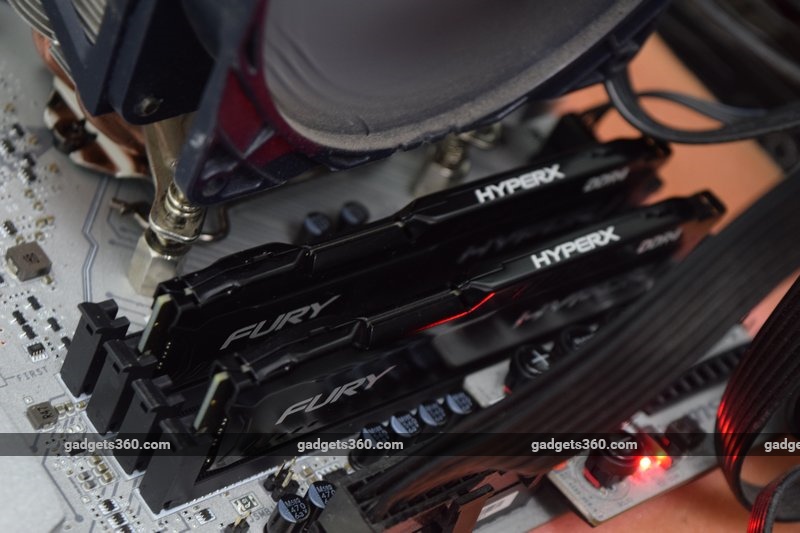
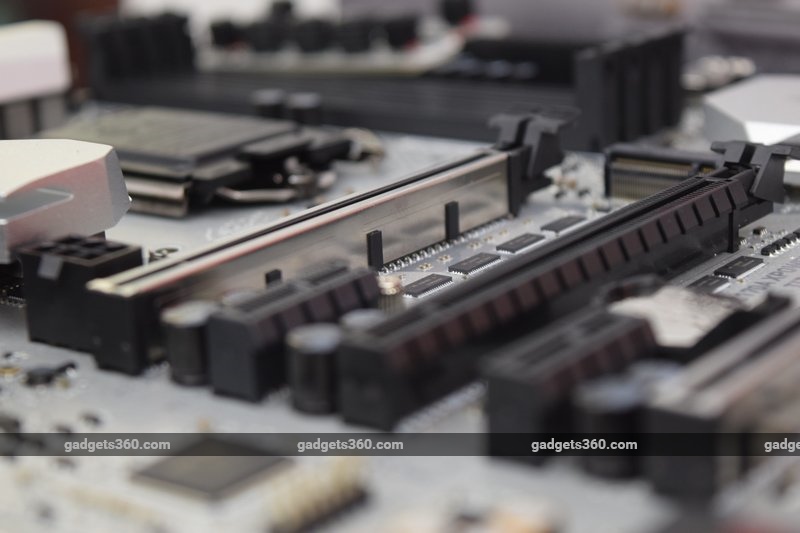 We immediately noticed that the RAM slots are quite close to the CPU socket. Big coolers and RAM with tall heatsinks will clash, but then again most people using a board like this will do so with a liquid cooling block which will mitigate that problem. MSI says the voltage regulating components around the CPU socket are of the highest quality, improving both stability at extreme settings and overall power efficiency.
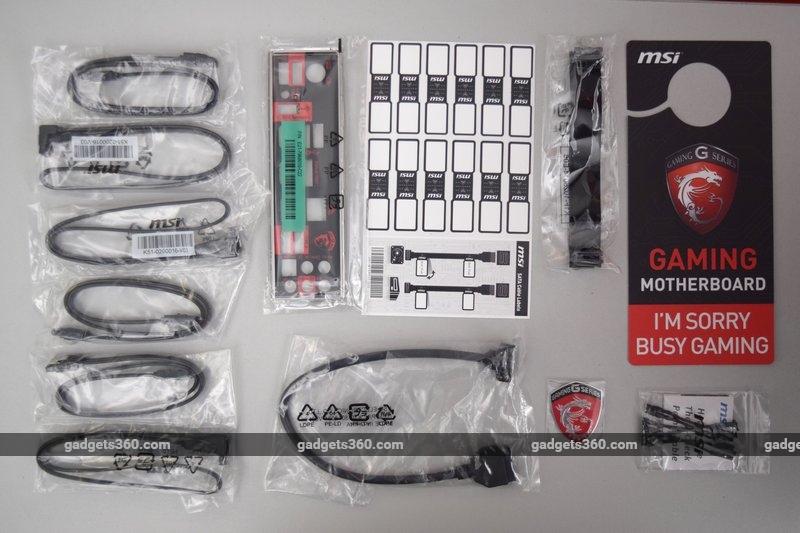
The full-length PCIe slots are spaced out, and you get a double-length SLI bridge in the box so you can gang up multiple cards and still have good air circulation. Four of the slots are full x16 length, but only the first one can actually deliver 16 lanes. The others work at x4, x8 and x4 respectively. The x16 and x8 slots have metallic shielding which should help stabilise the heaviest of graphics cards.
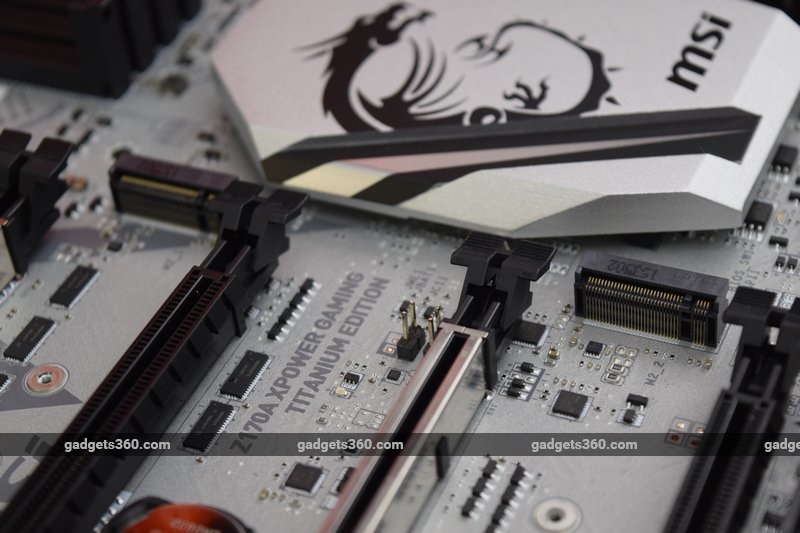 In between the four full-length slots are three x1 slots for smaller cards, and two x4 M.2 slots for the increasingly popular compact SSD format. There are four SATA ports on the front edge and two SATA Express ports, each of which can be repurposed to feed two additional SATA devices. SATA lanes are shared between the SATAe and M.2 connectors so you can’t fill all of them at the same time.
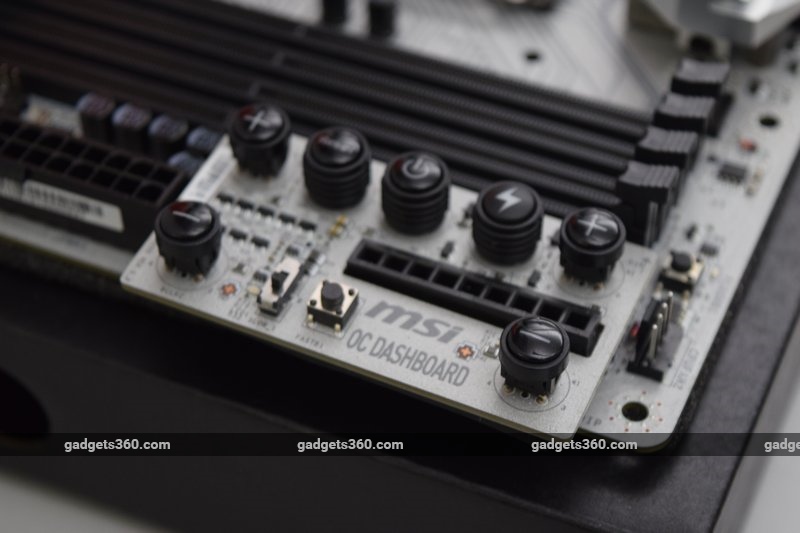
The Xpower Z170A has a small daughterboard in one corner, wedged up against the RAM slots and 24-pin power connector. It’s called OC Dashboard and is meant to help overclockers with a number of buttons they can use to adjust settings on the fly. The daughterboard is removable, and a short extension cable is provided in the box for ease of access. When mounted directly, it’s a bit wobbly thanks to an off-centre connector which is designed around the provided multimeter probe contacts.
 All the way on the other side, next to the handy power and reset buttons, is a rotary switch called Game Boost which can also be used for overclocking. You simply rotate it between the positions marked 0-11 to step up by predefined limits. The manual isn’t really helpful in describing how this works in tandem with other controls, or even what the increments are, so we’ll tread with caution.
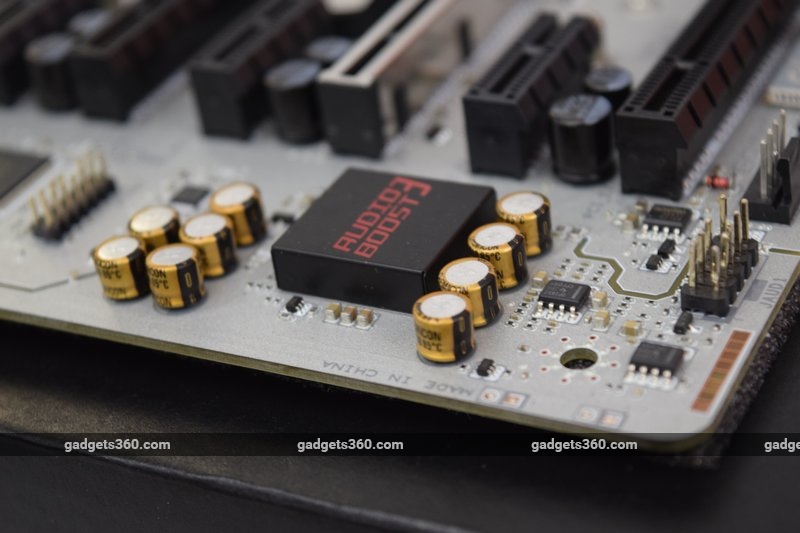
In the rear left corner, you’ll see an area physically partitioned off with what looks like a crack running through the PCB. This is the audio circuitry, which is physically isolated against interference. The “crack” actually lights up in red when the board is running, which looks absolutely gorgeous.
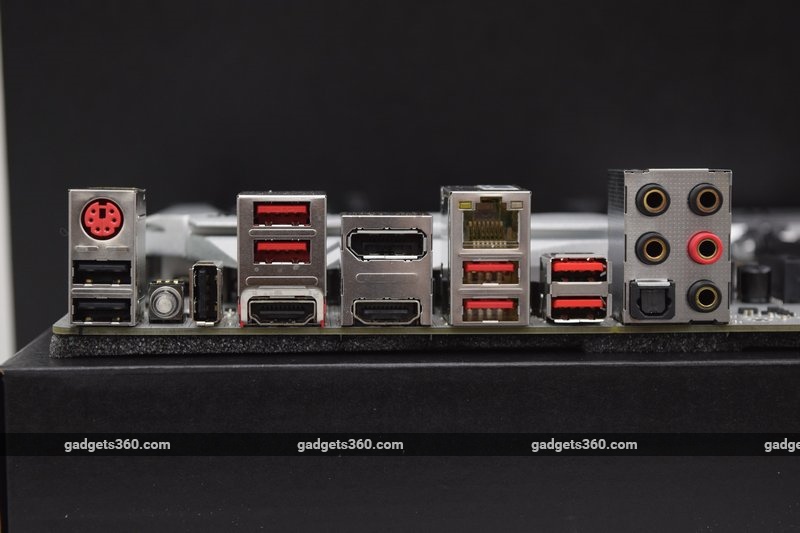
 The rear port cluster is quite dense. Starting from the end, there’s one legacy PS/2 port; two USB 2.0 ports; an externally accessible CMOS clear button; another vertically mounted USB 2.0 port; two HDMI outputs; one DisplayPort output; four USB 3.0 ports; two USB 3.1 ports; an Ethernet port; and the audio cluster including an optical S/PDIF out. You get two more USB 3.0 ports via a front panel header, and yet another actual port on the front of the board to help anyone who uses open test benches, such as overclockers, or wants to permanently attach hardware such as a Wi-Fi dongle.
Wired networking is handled by an Intel i219 controller. One designated USB 2.0 port on the rear supports MSI’s Hotkey feature which lets you program macros on any keyboard you plug in. The lone vertical USB 2.0 port is the one you need to use if you’re flashing the EFI firmware. Perhaps the biggest disappointment on the MSI Z170A Xpower is the lack of Type-C USB. Note also that MSI uses the terminology “USB 3.1 Gen 1” to refer to USB 3.0 speeds, which is technically correct but confusing. Finally, plenty of high-end desktop boards come with integrated Wi-Fi or multiple Ethernet ports, but the Z170A Xpower is not one of them.
 The Z170 platform controller hub
With Intel’s new socket comes a new generation of platform controllers, commonly referred to as chipsets. The Z170 is the top of the line, differentiated by its support for overclocking Intel’s unlocked K-series CPUs and the ability to host multiple graphics cards. The biggest change is the move to DDR4 RAM, which will allow for higher capacities and speeds going forward. Less glamorous but equally important is the upgrade to PCIe 3.0, and an increase in the number of lanes and the ways in which they can be allocated.
That translates to a lot of options for storage and connectivity. As stated earlier, there are several possible ways you can fill up your PCIe slots, M.2 slots, SATA ports and SATAe ports. The MSI Z170A Xpower’s USB 3.1 ports are not native, but their controller is fed through the same PCIe lanes. Manufacturers can also integrate Thunderbolt, Wi-Fi and other standards as offshoots of the PCIe bus. There’s also an upgrade to the interconnect between the CPU and platform controller, so overall users can expect a modern platform all around.
 For most users, Z170 boards will be overkill. The lower-end H170 will be more than enough for most gamers and even enthusiasts. It’s really only a small fraction of use cases that will benefit from the Z170’s overabundance of features and flexibility – though they’re definitely nice to have.
EFI and Software
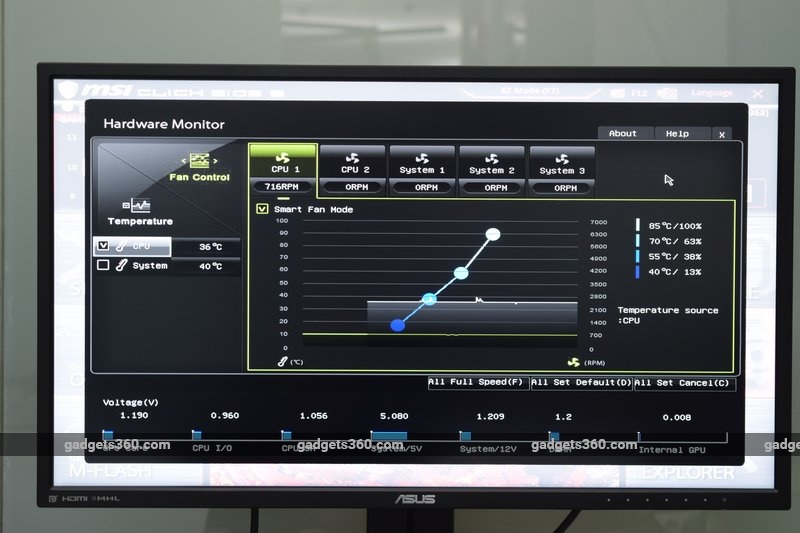
MSI has gone with rather garish dragon imagery on the bootup splash screen and you see the same thing front and centre in the EFI. MSI calls it Click BIOS 5, and you can use your mouse to get around the graphical interface. There are controls for major functions including the Game Boost knob, boot order, manual overclocking, and updating the firmware. You can adjust fan speed thresholds by dragging and dropping points on a representation of a graph. However, there are also loads of settings buried under submenus. You can go into very fine detail when it comes to voltage tweaking.
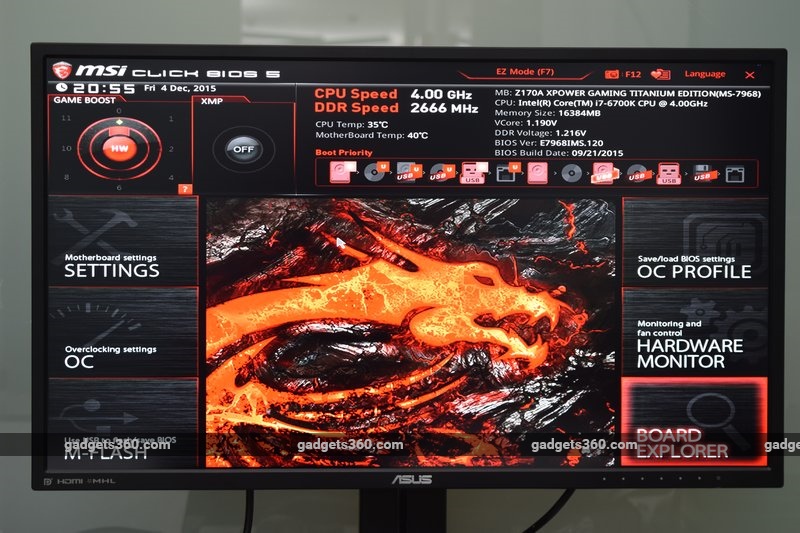 The overall presentation and layout could do with a lot of improvement. If you don’t want to dig through everything, there’s an Easy Mode which lays things out a little more clearly but doesn’t give you as much fine-grained control over parameters.
MSI ships its flagship motherboard with a tonne of software utilities. There’s a Nahimic Audio control app, co-branded versions of CPU-Z and Intel’s Extreme Tuning Utility, and a year’s subscription to Xsplit Gamecaster. In typical style, there are several of MSI’s own little utilities: one for LAN traffic prioritisation, one that reboots you into the BIOS with a single click, one to update the firmware, one to allow USB devices to charge more quickly by negotiating for power beyond the rated spec, one to create a RAMdisk, one for monitoring voltages and temperatures, and yet another for overclocking.
 Performance
We tested the MSI Z170A Xpower Gaming Titanium Edition with the following components:
- Intel Core i7-6700K CPU
- 2×8 GB Kingston HyperX DDR4-2666 RAM
- 120GB Kingston HyperX Fury SSD
- Cooler Master Hyper 212X cooler
- Corsair RM650 power supply
- Asus PB279 4K monitor
Our comparisons were made against a Haswell-generation rig with an Intel Core i7-4770K CPU, Asus Z97-Pro (Wi-Fi ac) motherboard and 2x4GB of Kingston DDR3-1600 RAM. All other components were the same. We tested using Windows 8.1 and all the latest drivers from each component manufacturer.
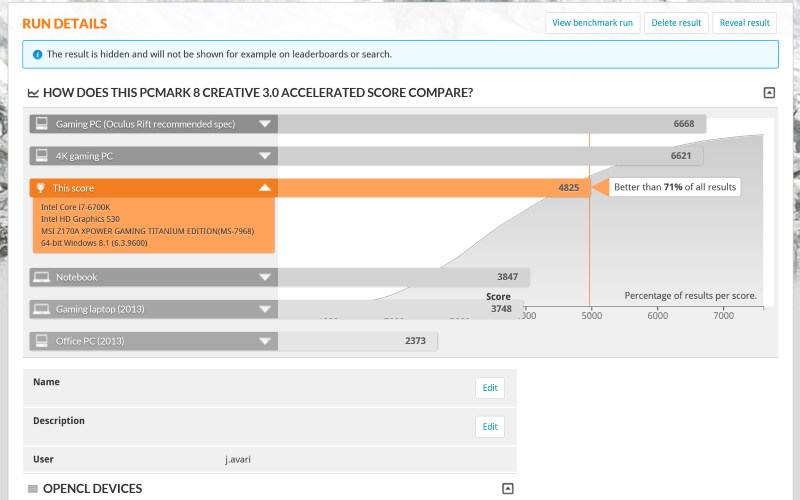
 Being a brand new platform, the performance figures apply to the motherboard, CPU and RAM working together. It isn’t possible to isolate the effects that any one of these components has on the final result. However, we were happy to see some significant improvements when compared to roughly equivalent Haswell-generation components.
PCMark gave us 3,202 in the Work runthrough and 4,825 in Creative, as opposed to 3,155 and 4,458 respectively on Haswell hardware. Cinebench returned 857 points on Skylake and 751 on Haswell, while POVRay rendered its benchmark scene in 2 minutes, 17 seconds and 2 minutes, 47 seconds on the newer and older platforms respectively.
 SiSoft SANDRA also showed gains across the board. The Processor Arithmetic Aggregate score went up from 113.91GOPS to 130.26GOPS; the Multimedia Aggregate rose from 323.6MPix/s to 417.67MPix/s; and Cryptography Bandwidth improved from 5.37GBps to 7.53GBps. The move to DDR4 RAM resulted in a huge boost in the Aggregate Memory Bandwidth score: 18.76GBps on Haswell and 30.17GBps on Skylake.
We ran through some real-world scenarios as well. First, we used 7-ZIP to compress 3.24GB of assorted files. While the Haswell rig took 1 minute, 13 seconds, the Skylake rig took only 57 seconds to finish the same work. We transcoded a 2.91GB QuickTime video file to H.264 using Handbrake, which took 48 seconds on Haswell vs. 39 seconds on Skylake.Wav to mp3 conversion in MediaCoder didn’t show as much improvement. Our three sample files were encoded in 59.7 seconds on Haswell and 56.9 seconds on Skylake.
 Overclocking
It should be obvious that this motherboard is total overkill for anyone who isn’t planning to overclock. In addition to the obvious adjustment controls on the board itself and its OC Dashboard companion, it’s clear what the designers had in mind. First of all, you’ll notice that in addition to the standard 24-pin ATX power connector and 8-pin supplementary input, there are additional 6-pin and 4-pin connectors near the rear port cluster. These two are optional, and are intended to help the board run stable when under massive pressure. A set of DIP switches on the left edge let you selectively disable PCIe slots.The diagnostic numeric LEDs start displaying CPU temperature after the boot sequence is complete.
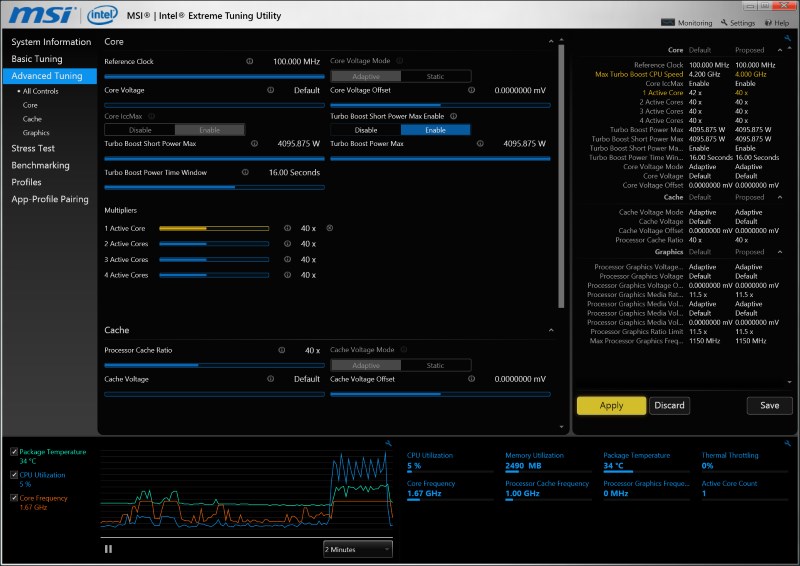
We used the Intel Extreme Tuning Utility and were able to achieve a stable overclock to 4.5GHz with just a few clicks. CPU temperature peaked at 67°C while running the utility’s internal stress test. With adequate cooling and knowledge of multiplier and voltage tweaking, anyone could exceed this level.
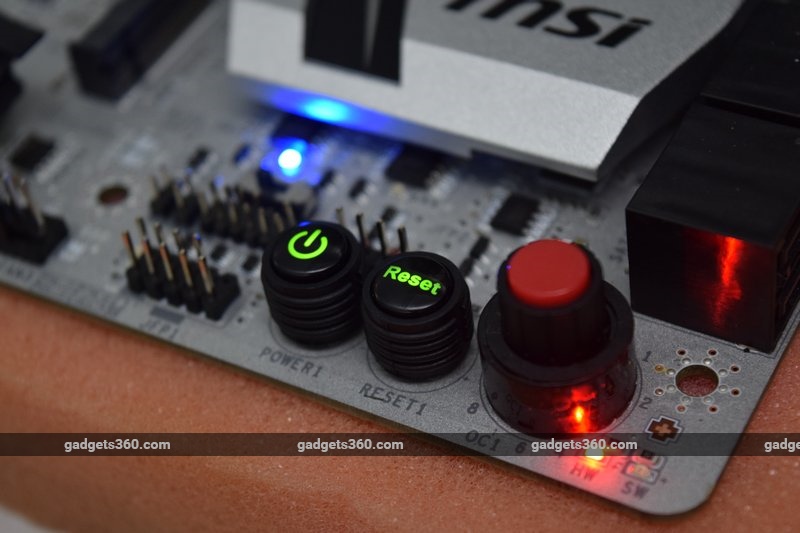 One odd thing about the MSI Z170A Xpower is the sheer number of redundant overclocking mechanisms it offers. You have manual options though the EFI or the multiple bundled apps; the Game Boost knob; Game Boost through software; and of course the OC Dashboard.
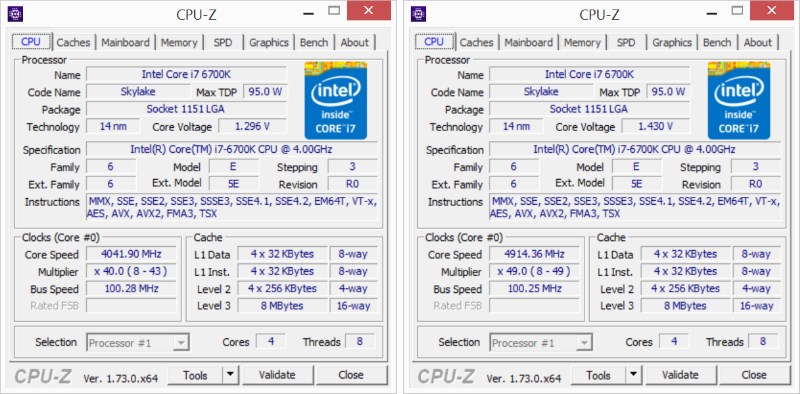
We tried out the knob and have to say that it works pretty much as advertised. You need to shut down your PC before using it. Our Core i7-6700K was easily pushed to 4.5GHz at position 4 on the knob, and our rig ran stably enough to complete a Cinebench run. Our CPU score went up from 857 to 989, which is quite impressive. At position 6, CPU-Z still reported 4.5GHz, which seemed odd. The rig booted up at position 10 and CPU-Z showed 4.9GHz, but it crashed to a blue screen of death with the error message CLOCK_WATCHDOG_TIMEOUT when we tried running Cinebench. We couldn’t even boot up at position 11 – a more robust power supply and CPU cooler would be needed to pull this off.
 The Game Boost feature is clever, but it makes sense to us only as a jumping-off point from which to explore the manual options. It does feel really cool to overclock by literally cranking a knob, but we’re not sure who would buy a board this expensive with this much fine-grained control only to choose preset options. We would love to see it on lower-end boards though, giving more casual users a safe and easy way to overclock.
Verdict
MSI has done a phenomenal job with the Z170A Xpower Gaming Titanium Edition motherboard. It’s ridiculously expensive, but that’s how bragging rights work. If you want a stunning, unique motherboard to show off inside your new top-of-the-line Skylake machine, this is the one to get. It’s quite likely that we’ll see similar printing on other motherboards in the future – if it goes mainstream, all kinds of new modding possibilities will open up. For now though, you have to pay top dollar.
 Apart from looks, this motherboard also has a pretty phenomenal feature set. You won’t be left wanting for storage device flexibility, but the lack of USB Type-C really hurts. At least one port should be standard on flagship motherboards at this point, even if it isn’t running at the full 10Gbps speed that USB 3.1 enables. A second Ethernet port and Wi-Fi would also have been nice.
Don’t spend so much on this motherboard if you aren’t planning to overclock manually. In fact, you should also consider the enthusiast Haswell-E platform or its upcoming successor, Broadwell-E if you’re shopping around in this price range. The Z170A Xpower is really more of a showpiece that MSI can impress fans with at OC events; almost any gamer and enthusiast would be able to do just as well with a less outrageous model – even those who have the money to burn.
Price: Rs. 26,000
Pros
- Looks absolutely stunning
- Easy overclocking as well as comprehensive tweaks
- Loads of storage and expansion options
Cons
- No USB Type-C ports
- Slightly cumbersome EFI BIOS
Ratings (Out of 5)
- Performance: 4.5
- Value for Money: 4
- Overall: 4.5
Download the Gadgets 360 app for Android and iOS to stay up to date with the latest tech news, product reviews, and exclusive deals on the popular mobiles.
[“Source-Gadgets”]
