

Lipstick is one of the easiest ways to transform a makeup look. A simple swipe of color can make the face look brighter, more polished, and more expressive. However, for beginners, applying lipstick neatly and making it last throughout the day can sometimes feel difficult. Uneven edges, dry lips, bleeding color, or choosing the wrong shade are common challenges.
The good news is that applying lipstick doesn’t require professional makeup skills. With a few basic techniques and the right preparation, anyone can achieve a smooth and attractive finish. Here is a simple beginner-friendly guide to mastering lipstick application.
1. Start With Clean, Smooth Lips
The first step toward beautiful lipstick is preparing your lips. If your lips are dry or flaky, lipstick can settle into the uneven areas and create a patchy appearance.
Gently exfoliate your lips when needed using a mild lip scrub or a soft, damp washcloth. Avoid rubbing too aggressively because the skin on the lips is delicate.
After exfoliation, apply a moisturizing lip balm and give it a few minutes to absorb. If there is excess balm, gently blot it with a tissue before applying lipstick.
2. Choose the Right Lipstick Formula
Beginners should understand that different lipstick formulas behave differently.
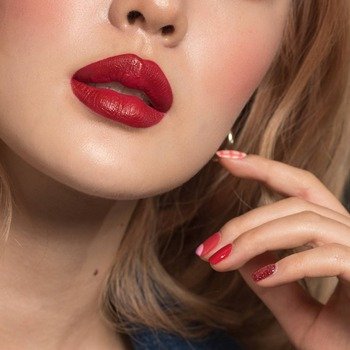
Cream lipsticks are generally comfortable and easy to blend, making them a good starting point. Matte lipsticks provide a sophisticated finish but may highlight dryness if the lips are not properly moisturized. Glossy or satin lipsticks offer a softer, more hydrated appearance.
If you’re new to lipstick, start with a comfortable formula that is easy to control. Once you’re confident, you can experiment with long-lasting mattes, liquid lipsticks, and other finishes.
3. Pick a Shade That Makes You Comfortable
There are no strict rules about which lipstick color you must wear. However, beginners may find it easier to start with shades that are close to their natural lip color.
Soft pinks, rosy nudes, peachy shades, and muted reds can be relatively easy to wear. Once you become more comfortable, you can experiment with deeper reds, berries, browns, and brighter colors.
The best shade is ultimately one that makes you feel confident.
4. Use Lip Liner for Better Definition
Lip liner is not compulsory, but it can make lipstick application much easier. It helps define the shape of your lips and can prevent lipstick from spreading outside the lip line.
Choose a liner that closely matches your lipstick or resembles your natural lip color. Begin at the center of the upper lip and carefully follow the natural outline toward the corners.
On the lower lip, start near the center and work outward. Beginners should avoid dramatically changing their natural lip shape at first. Following the existing outline usually creates a more natural result.
5. Apply Lipstick From the Center
Instead of immediately covering the entire lip with a large amount of product, start from the center.
Apply lipstick to the middle of the upper and lower lips, then gently spread the color toward the corners. Using a lipstick bullet directly gives good control, while a lip brush can provide greater precision.
For stronger pigmentation, apply a second thin layer rather than putting on a thick layer at once.
6. Use a Lip Brush for Precision
A lip brush can be particularly helpful when working with bold shades. It allows you to control exactly where the product goes and makes it easier to create clean edges.
Take a small amount of lipstick onto the brush and gradually build the color. This technique can also help you avoid applying too much product.
For beginners who struggle with neat application, a brush can make a noticeable difference.
7. Clean Up the Edges
Even experienced makeup users sometimes make small mistakes. Fortunately, they are easy to correct.
Use a cotton swab to gently remove lipstick that has gone outside the natural lip line. For a more polished finish, you can apply a tiny amount of concealer around the outer edges of your lips.
Be careful not to apply too much concealer, as it can make the lip area look unnatural.
8. Make Your Lipstick Last Longer
If you want your lipstick to stay in place for several hours, layering is an effective technique.
Apply the first layer, gently blot your lips with a tissue, and then apply another thin layer. You can also lightly fill in your lips with a matching lip liner before applying lipstick.
For meals or long events, carrying your lipstick for quick touch-ups is often the simplest solution.
9. Avoid Common Beginner Mistakes
There are a few mistakes that can make lipstick look less polished. Applying lipstick over extremely dry lips is one of the most common. Using too much product can also cause smudging or make the lips feel heavy.
Another mistake is choosing a shade simply because it looks attractive in the packaging. Lipstick can appear different depending on your natural lip color and the lighting.
Finally, don’t feel pressured to create perfectly symmetrical lips. Natural lips are rarely perfectly identical on both sides.
10. Practice Different Looks
The best way to improve lipstick application is simply to practice. Try applying a subtle nude during the day, a rosy shade for a casual outing, and a classic red when you want something more dramatic.
Experiment with lipstick, liner, and different application methods to discover what works best for you.
Final Thoughts
Learning how to apply lipstick neatly doesn’t have to be complicated. Start by keeping your lips moisturized, choose a comfortable formula, define the lips with liner if needed, and apply the lipstick gradually from the center outward.
Most importantly, don’t worry about getting everything perfect on your first attempt. With a little practice, you’ll become more comfortable with different shades and techniques. Whether you prefer a natural everyday look or a bold statement lip, these beginner-friendly techniques can help you create a smoother, more confident finish every time.